As a professional cleaner with over a decade of experience and a busy mom who’s tackled every kind of mess, I’ve spent years perfecting the best homemade floor cleaners. I’ll never forget the time my kitchen floor was covered in sticky juice spills and muddy paw prints from my dog, Max.
Store-bought cleaners left streaks or smelled like chemicals, so I turned to my pantry for solutions that worked better and were safer for my family. Let me share my favorite recipes, personal stories, and practical tips to help you keep your floors sparkling clean with simple ingredients.
Floors take a beating—dirt, spills, and pet messes add up fast. My homemade cleaners are affordable, safe for kids and pets, and tailored to different floor types. If you’re cleaning hardwood, tile, laminate, or vinyl, these methods will make your floors shine without breaking the bank.
Image by wellnessmama
Why I Swear by Homemade Floor Cleaners
When I first started cleaning, I relied on commercial products, thinking they were the only way to get floors spotless. But after using one that left my hardwood floors dull and sticky, I was frustrated. Then, Max tracked mud across my living room, and I decided to try a homemade solution.
It was a game-changer—my floors looked better than ever, and I didn’t worry about harsh chemicals around my kids or pets. Homemade cleaners are gentle, budget-friendly, and let me control what goes into them. Plus, they’re eco-friendly, which feels good for my home and the planet.
Different floors need different care—hardwood can’t handle too much water, tile needs grout attention, and laminate is sensitive to harsh chemicals. My recipes are designed to tackle dirt while keeping your floors safe. Here’s how I do it.
My Favorite Homemade Floor Cleaner Recipes
I’ve developed four go-to recipes that handle everything from daily dust to stubborn stains. Each one is tested in my own home and for clients, using ingredients you likely have in your pantry. They’re safe, effective, and leave your floors gleaming.
Vinegar and Water All-Purpose Cleaner
This is my everyday cleaner for most floors—hardwood, tile, and vinyl. Vinegar cuts through light dirt and leaves a streak-free shine. I discovered it when my kitchen floor was covered in crumbs after a family dinner.
Ingredients:
- 1 cup white vinegar
- 1 gallon warm water
- A bucket or spray bottle
- A microfiber mop
- Optional: 5 drops lavender essential oil for a fresh scent
How to Make It:
- Fill a bucket or spray bottle with warm water.
- Add the vinegar and stir gently. The dilution prevents damage to sensitive floors.
- Add lavender oil if you want a pleasant smell.
How to Use It:
- Sweep or vacuum the floor to remove loose dirt or pet hair.
- Dip a microfiber mop in the solution or spray lightly on the floor. Don’t soak—less is more.
- Mop in small sections, following the floor’s grain for wood or laminate.
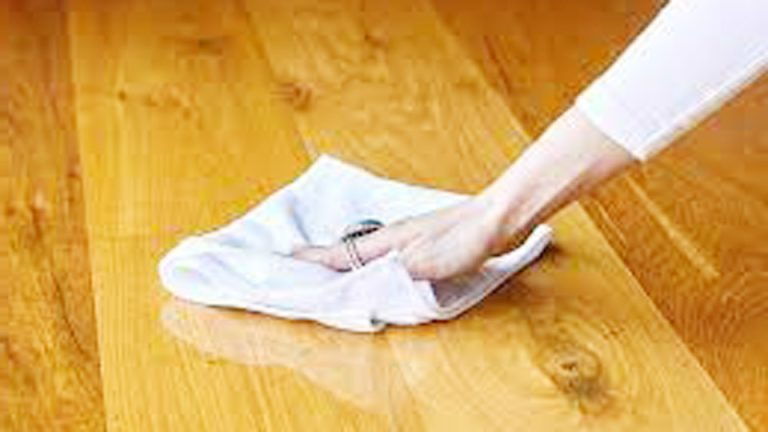
- Dry immediately with a clean microfiber cloth to avoid streaks or water spots.
- Buff with a dry cloth for extra shine.
After a chaotic dinner party, my kitchen floor was a mess of crumbs and spills. This cleaner took 10 minutes to make my tile floors sparkle, and the lavender scent was a bonus.
Dish Soap and Rubbing Alcohol Spot Cleaner
For sticky messes like juice or grease, this recipe is my go-to. Rubbing alcohol dries fast, and dish soap tackles stickiness without residue. I used it when my toddler spilled syrup on our vinyl floor.
Ingredients:
- ½ cup rubbing alcohol (70% isopropyl)
- ½ cup warm water
- 1 teaspoon mild dish soap (I use Dawn)
- A spray bottle
- A microfiber cloth
How to Make It:
- Mix the rubbing alcohol, water, and dish soap in a spray bottle.
- Shake gently to combine.
How to Use It:
- Sweep or vacuum the area to clear debris.
- Test the cleaner on a hidden spot, like under furniture, to ensure it’s safe.
- Spray lightly on the sticky spot or stain.
- Let it sit for 2–3 minutes to loosen the mess.
- Wipe with a damp microfiber cloth, then dry immediately with a clean cloth.
- Buff for a polished look if needed.
That syrup spill was a sticky disaster. This cleaner lifted it in minutes, and my vinyl floor looked brand new without any cloudiness.
Baking Soda and Vinegar Paste for Tough Stains
For scuffs, heel marks, or dried-on messes, this paste is my secret weapon. Baking soda’s abrasiveness removes stains, and vinegar helps lift them. I used it on a client’s tile floor with grout stains.
Ingredients:
- 2 tablespoons baking soda
- 1 tablespoon white vinegar
- A small bowl
- A soft sponge or toothbrush
How to Make It:
- Mix the baking soda and vinegar in a bowl to form a paste. It fizzes, which is normal.
- Stir until it’s spreadable. Add more baking soda if it’s too runny.
How to Use It:
- Sweep or vacuum the stained area.
- Test the paste on a hidden spot to avoid damage.
- Apply the paste to the stain with a sponge or toothbrush (great for grout).
- Let it sit for 5 minutes to loosen the stain.
- Scrub gently in circular motions.
- Wipe clean with a damp cloth, then dry thoroughly.
The client’s tile grout was dark with dirt. This paste cleaned it in one go, and they were amazed at how bright their floor looked.
Castile Soap and Warm Water for Hardwood
Hardwood floors need extra care to avoid water damage. Castile soap is gentle and effective for sealed hardwood. I used this when my dining room floor looked dull after a winter of muddy boots.
Ingredients:
- ¼ cup liquid castile soap
- 1 gallon warm water
- A bucket
- A microfiber mop
How to Make It:
- Fill a bucket with warm water.
- Add the castile soap and stir gently to avoid bubbles.
How to Use It:
- Sweep or vacuum to remove dust and debris.
- Dip a microfiber mop in the solution, wringing it out well—hardwood can’t handle excess water.
- Mop in the direction of the wood grain.
- Dry immediately with a clean microfiber cloth to prevent water spots.
- Buff with a dry cloth for shine.
My dining room floor was lifeless after months of neglect. This cleaner restored its glow, and I felt like I’d given my home a mini-makeover.
Choosing the Right Cleaner for Your Floor Type
Different floors need different cleaners to avoid damage. Here’s a guide based on my experience to help you pick the best recipe.
| Floor Type | Best Recipe | Why It Works | Tips from My Experience |
|---|---|---|---|
| Hardwood (Sealed) | Castile Soap and Warm Water | Gentle and low-moisture; protects wood finish. | Wring mop tightly; dry immediately to prevent warping. |
| Tile | Vinegar and Water Shine Booster | Cuts through dirt and cleans grout without residue. | Use the baking soda paste for stubborn grout stains. |
| Laminate | Vinegar and Water Shine Booster | Safe for sensitive laminate; streak-free shine. | Avoid over-wetting; test cleaners on a hidden spot first. |
| Vinyl | Dish Soap and Rubbing Alcohol | Tackles sticky messes and dries fast; safe for vinyl. | Spray sparingly and dry quickly to avoid streaks. |
| Unknown Floor | Vinegar and Water Shine Booster | Versatile and safe for most floors; least likely to cause damage. | Check manufacturer’s care guide and test in a hidden spot. |
My Tip: Always check your floor’s care instructions. Some laminates or hardwoods have special coatings, so testing cleaners in a hidden spot saves headaches.
My Step-by-Step Floor Cleaning Process
Cleaning floors is about technique as much as the cleaner. Here’s my process, refined over years of scrubbing.
Sweep or Vacuum First: Remove loose dirt, pet hair, or crumbs. I use a vacuum with a bare-floor setting to avoid scratches.
Test Your Cleaner: Apply a small amount to a hidden area, like under a table. I wait 5 minutes to check for damage.
Apply the Cleaner: For mopping, dip a microfiber mop lightly or spray sparingly. For spot cleaning, target specific areas.
Mop or Wipe: Mop in the direction of the floor’s grain or tiles. For spot treatments, wipe gently with a cloth.
Dry Immediately: Use a dry microfiber cloth to prevent water spots or warping, especially on hardwood and laminate.
Buff for Shine: If the floor looks dull, I buff with a dry cloth for a polished finish.
Inspect Your Work: Check for missed spots in good light. I repeat for stubborn stains if needed.
My Experience: Max’s muddy paw prints were all over my laminate hallway. This process took 15 minutes, and the floor looked flawless—no streaks or damage.
Common Mistakes to Avoid
I’ve made plenty of cleaning errors, and I want to save you the trouble. Here are mistakes I’ve learned to avoid:
Using Too Much Water: Excess water can warp hardwood or seep into laminate seams. I wring out my mop tightly or use a spray bottle.
Skipping the Test: I once dulled a client’s hardwood with a too-strong cleaner. Always test in a hidden spot.
Using Harsh Chemicals: Bleach or ammonia can strip finishes. I stick to gentle, homemade solutions.
Scrubbing Too Hard: Aggressive scrubbing can scratch floors. I use soft sponges and gentle pressure.
Not Drying: Wet floors lead to streaks or damage. I always dry with a microfiber cloth.
I left my hardwood floor damp once, and it looked cloudy. Now, I dry every section, and my floors gleam like a showroom.
Why I Love Homemade Floor Cleaners
Homemade cleaners are my go-to because they’re safe, affordable, and work better than many store-bought options. I don’t worry about toxic fumes around my kids or Max, and I save money by using pantry staples.
The first time I used the vinegar and water cleaner on my tile floor, I was amazed at the shine—no streaks, no residue. It felt like I’d cracked the code to perfect floors, and I love customizing scents with essential oils to make cleaning feel special.
Maintaining Floors Between Deep Cleans
To keep floors looking great, I use these habits between deep cleans:
- Sweep or Vacuum Daily: I sweep high-traffic areas to catch dust and pet hair before they build up.
- Spot-Clean Spills: I dab sticky messes immediately with my dish soap cleaner to prevent stains.
- Use Doormats: Mats at entrances trap dirt. I shake them out weekly to keep grit off floors.
- No-Shoes Rule: I ask everyone to remove shoes to reduce dirt and scuffs. Max’s paws are enough to handle!
- Buff Weekly: I buff with a dry microfiber cloth to maintain shine without cleaning.
The no-shoes rule transformed my floors. After starting it, I noticed less dirt, and deep cleaning became quicker and easier.
Encouragement for Your Cleaning Journey
Cleaning floors can feel like a chore, but you’re more than capable of making them shine! These homemade cleaners are simple, effective, and safe, giving you a clean home you can be proud of.
Start with one recipe, try my process, and enjoy the satisfaction of sparkling floors. You’re creating a beautiful, healthy space for your family, and I’m cheering you on every step of the way!
FAQ
What is the best homemade floor cleaner for hardwood?
My castile soap and water recipe is perfect for sealed hardwood. It’s gentle, low-moisture, and leaves a beautiful shine without damage.
Are these cleaners safe for laminate floors?
Yes, the vinegar and water cleaner is great for laminate. I use it sparingly and dry immediately to avoid warping or streaks.
Can I use these cleaners on tile grout?
Absolutely. The baking soda and vinegar paste works wonders on grout. I scrub with a toothbrush for tough stains and rinse well.
How do I prevent streaks on my floors?
I use a microfiber mop, apply cleaner lightly, and dry immediately with a clean cloth. Buffing afterward ensures a streak-free finish.
Are these cleaners safe for homes with pets or kids?
Yes, my recipes use non-toxic ingredients like vinegar and baking soda. I keep pets and kids off wet floors until they’re dry.
How often should I deep clean my floors?
I deep clean every 1–2 months, but I sweep daily and spot-clean as needed to keep floors looking fresh between cleans.

